


|
|
|
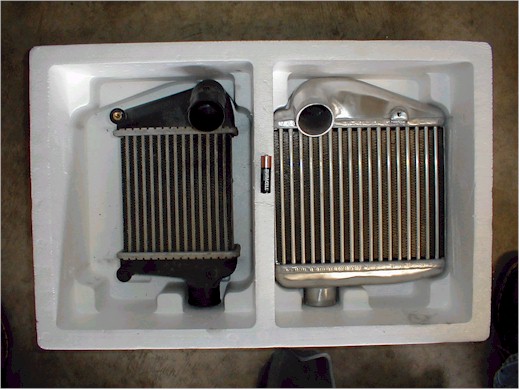
To reliably and safely turn up the boost (and, therefore, increase horsepower), it is imperative to ditch the stock intercoolers and upgrade to larger ones. Intercoolers are effectively "air radiators" from the turbos. By cooling down the air, this increases the density of that air. More density = more molecules within the same amount of space = more to burn (in a manner of speaking). Your choices are mainly limited on the Z to two side-mount intercoolers that replace the stock ones, or one big FMIC (Front Mount InterCooler). There has been much debate over which type is truly better for the Z in particular, although the general consensus gives the nod to the side mounts. Another couple of items to be aware of are pressure drop and the effectiveness of the intercoolers themselves. All intercoolers are not created equal. Some are literally designed differently. Internally, you could have fin/core differences going back to heat distribution theory. Also, the height/width dimensions are different between the main brands. Furthermore, there is pressure drop associated with reducing the charged air which could result in issues as you continue to raise boost, etc. There are several popular choices from which to choose: HKS, GReddy, APEX'i, Stillen. I chose HKS because (a) the price was right and (b) the performance was basically on par with the others. Yes, there are slight variations in the intake/exit air temperature of the different brands, but for most people's practical purposes, it boils down to simple preference. This first picture compares the stock unit (left) vs. the HKS unit (right):
(Note: The battery is for scale). While you can technically install these with the front fascia still on, it is much preferable simply to take a little time and pull of the front. Time is about 30 minutes - 1 hour. It is well worth the time! Below is a shot with the front bumper removed, and the aftermarket installed. You will have to remove some plastic tubing that had connected the stock airbox to the stock intercoolers. At this stage, you have already replaced that anyway. So, you just pull it through an area between the front POP charger and the intercooler. Easy. Next, you will find the stock air channels for the intercoolers. Take these out. If you order the Stillen units, you can also order some larger size air channels for their units. As of this writing, HKS does not make them. You could reattach the stock air channels after the new units, but you will significantly reduce "cooling area". I chose to leave them off. I have had no problems doing so. (Note: An aftermarket fascia with larger intakes would presumably help out in ducting the air to the new larger units). As is, I believe you are still not utilizing the full extent of the intercoolers without (a) a larger front intake opening and (b) better forced channel air routing. Now, the taking off the stock intercooler was quite simple; just unbolt the stock unit, and bolt in the new one with the included hardware.
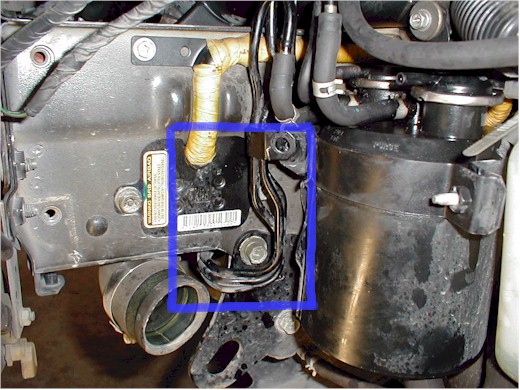
Now, the driver's side took a little more time. The carbon cannister's lines (very pliable) blocked the smooth install. You basically have to bend them up. This causes no problems, but just be careful. Don't snap the lines. However, I think you will also find this easy to do; while the lines are pliable, they also "feel" sturdy.
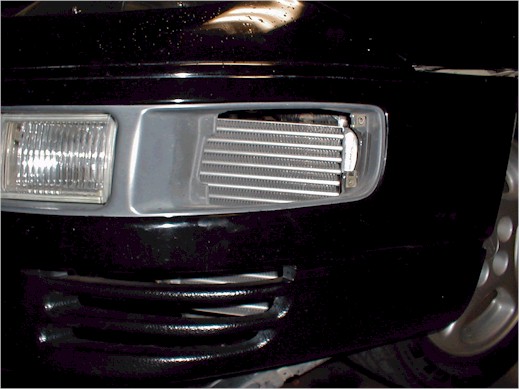
(Note: The blue box highlights the cannister lines in their stock form. Just bend them up). After installed, just reattach the bumper. Here is a picture showing how large they really are (with the side marker taken out).
There are a couple of guys that will leave it off for more air cooling effect, but it looks cheesy in my opinion. The light was reinstalled.
|